
Step by Step Kamailio installation on ubuntu server.
kamailio and asterisk configuration on aws
Install Kamailio With Siremis GUI on Cloud – AWS,Azure With Public IP
Blog By :- Tech Himachali Youtube Community
In this tutorial, we will learn how to install and configure the Kamailio SIP server on Ubuntu 20.04.
Step 1 – Install Required Dependencies
First, you will need to install some required packages on your server. You can install all of them with the following command:
apt-get install gnupg2 mariadb-server curl unzip -y
Once all the packages are installed, you can proceed to the next step.
Step 2 – Install Kamailio Server
By default, Kamailio package is not available in the Ubuntu 20.04 default repository, so you will need to add Kamailio repository in your system.
First, import the Kamailio GPG key with the following command:
wget -O- http://deb.kamailio.org/kamailiodebkey.gpg | apt-key add –
Next, add the Kamailio repository with the following command:
nano /etc/apt/sources.list.d/kamailio.list
Add the following lines:
deb http://cz.archive.ubuntu.com/ubuntu bionic main
deb http://deb.kamailio.org/kamailio53 bionic main
deb-src http://deb.kamailio.org/kamailio53 bionic main
Save and close the file when you are finished.
Next, update the repository and install the Kamailio server with other packages using the following command:
apt-get update -y apt-get install kamailio kamailio-mysql-modules kamailio-websocket-modules kamailio-tls- modules -y
Once all the packages are installed, verify the installed version of Kamailio with the following command:
kamailio -V
You should get the following output:version:
kamailio 5.3.5 (x86_64/linux)
Step 3 – Configure Kamailio
Next, you will need to edit /etc/kamailio/kamctlrc file and define the database engine, database host, and SIP domain.nano /etc/kamailio/kamctlrc
Change the following lines:## your SIP domain SIP_DOMAIN=your-server-ip DBENGINE=MYSQL ## database host DBHOST=localhost
Save and close the file.
Next, create a database, user, and tables needed for Kamailio using the following command:
kamdbctl create
You will be asked to enter a MySQL root password as shown below:
MySQL password for root:
Leave it blank and just press Enter to continue. You will be asked to provide a character set as shown below:-e Enter character set name:
utf32
Type utf32 and hit Enter to continue. You should see the following output:-e \E[37;33mINFO:
creating database kamailio … -e \E[37;33mINFO: granting privileges to database kamailio … -e \E[37;33mINFO: creating standard tables into kamailio … -e \E[37;33mINFO: Core Kamailio tables succesfully created. Install presence related tables? (y/n): y -e \E[37;33mINFO: creating presence tables into kamailio … -e \E[37;33mINFO: Presence tables succesfully created. Install tables for imc cpl siptrace domainpolicy carrierroute drouting userblacklist htable purple uac pipelimit mtree sca mohqueue rtpproxy rtpengine secfilter? (y/n): y -e \E[37;33mINFO: creating extra tables into kamailio … -e \E[37;33mINFO: Extra tables succesfully created. Install tables for uid_auth_db uid_avp_db uid_domain uid_gflags uid_uri_db? (y/n): y -e \E[37;33mINFO: creating uid tables into kamailio … -e \E[37;33mINFO: UID tables succesfully created.
Next, edit the Kamailio main configuration file and enable some features:
nano /etc/kamailio/kamailio.cfg
Add the following lines below
#!KAMAILIO.
#!define WITH_MYSQL
#!define WITH_AUTH
#!define WITH_USRLOCDB
#!define WITH_ACCDB
Save and close the file, then restart the Kamailio service to apply the changes:
systemctl restart kamailio
You can also verify the Kamailio service with the following command:
systemctl status kamailio
You should get the following output:
- kamailio.service – Kamailio (OpenSER) – the Open Source SIP Server Loaded: loaded (/lib/systemd/system/kamailio.service; enabled; vendor preset: enabled) Active: active (running) since Tue 2020-09-01 16:05:05 UTC; 6s ago Process: 19835 ExecStart=/usr/sbin/kamailio -P /run/kamailio/kamailio.pid -f $CFGFILE -m $SHM_MEMORY -M $PKG_MEMORY (code=exited, status=0> Main PID: 19847 (kamailio) Tasks: 32 (limit: 2353) Memory: 24.6M CGroup: /system.slice/kamailio.service ├─19847 /usr/sbin/kamailio -P /run/kamailio/kamailio.pid -f /etc/kamailio/kamailio.cfg -m 64 -M 8 ├─19849 /usr/sbin/kamailio -P /run/kamailio/kamailio.pid -f /etc/kamailio/kamailio.cfg -m 64 -M 8 ├─19850 /usr/sbin/kamailio -P /run/kamailio/kamailio.pid -f /etc/kamailio/kamailio.cfg -m 64 -M 8 ├─19851 /usr/sbin/kamailio -P /run/kamailio/kamailio.pid -f /etc/kamailio/kamailio.cfg -m 64 -M 8 ├─19852 /usr/sbin/kamailio -P /run/kamailio/kamailio.pid -f /etc/kamailio/kamailio.cfg -m 64 -M 8
Step 4 – Install Siremis Dashboard
Siremis is a web-based interface used for managing a Kamailio SIP server. You can view accounting, registered phones, provision user profiles, routing rules, and communicate with the SIP server via xmlrpc using the Siremisis.
Install Apache and PHP
First, you will need to install Apache, PHP, and other PHP modules in your system. You can install them with the following command:
apt-get install apache2 php libapache2-mod-php php-mysql php-gd php-curl php-xml php-pear make git -y
Once all the packages are installed, install XML_RPC with the following command:
pear install XML_RPC2
Download Siremis
First, change the directory to Apache web root and download the latest version of Siremis from the Git repository:
cd /var/www/ git clone https://github.com/asipto/siremis
Next, change the directory to Siremis and generate the Apache virtual host configuration file using the following command:
cd siremis make apache24-conf | tee /etc/apache2/sites-enabled/siremis.conf
Next, create .htaccess and Siremis configuration files by running the following command:
make prepare24
You should see the following output:
updating htaccess file for apache 2.4 … deploying htaccess files for apache 2.4 in subdirs … updating app.inc file… creating folders… done
Next, set proper ownership with the following command:
make chown
You should get the following output:
changing onwner to www-data:www-data …
chown -R www-data:www-data .
Next, log in to the MariaDB shell with the following command:
mysql
Once logged in, create a new siremis user and grant all the privileges to the siremis database:
GRANT ALL PRIVILEGES ON siremis.* TO siremis@localhost IDENTIFIED BY ‘password’;
Next, flush the privileges and exit from the MariaDB with the following command:
flush privileges;
exit;
Finally, enable the Apache rewrite module and restart the Apache service with the following command:
a2enmod rewrite
systemctl restart apache2
Step 5 – Access Siremis Dashboard
Now, open your web browser and access the Siremis dashboard using the URL http://your-server-ip/siremis. You will be redirected to the Siremis installation wizard:
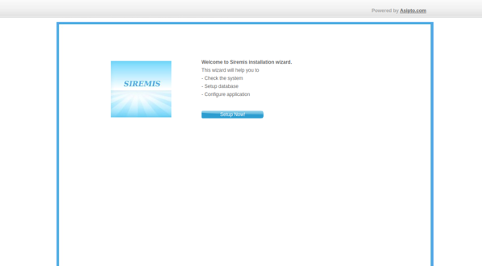
Click on the Setup Now! button. You should see the following page:
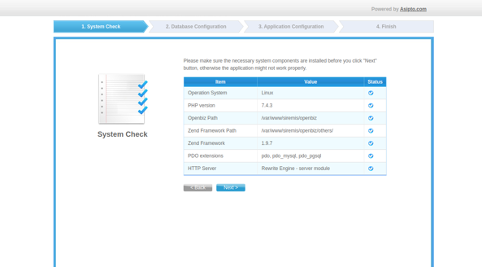
Make sure all the dependencies are installed, then click on the Next button. You should see the following page:
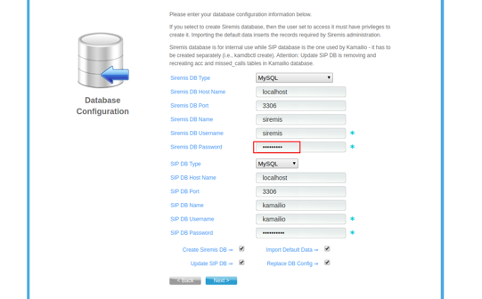
Provide the siremis DB user password in “Siremis DB Password” and click on the Next button. You should see the following page:
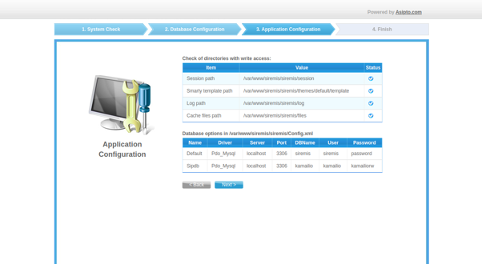
Check all directories for write access and click on the Next button. You should see the following page:
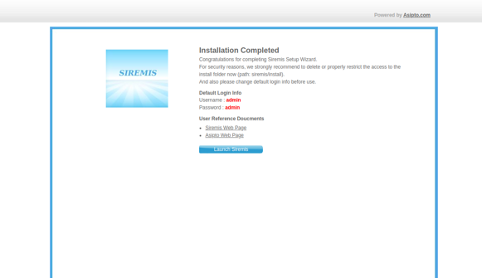
Click on the Launch Siremis. You will be redirected to the Siremis login page:
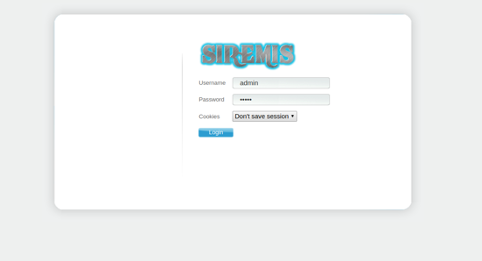
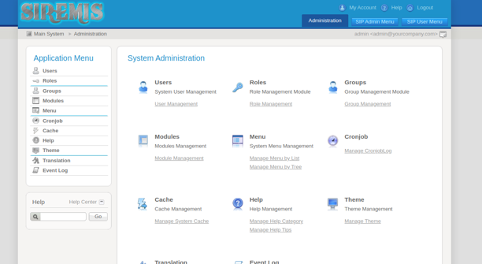
Provide the default admin username and password as admin / admin and click on the Login button. You should see the Siremis dashboard in the following page:
Conclusion
If you are using Kamailio on Public IP then use below line Kamailio.cfg
listen=udp:172.31.35.226(localIP):5060 advertise 43.205.312.134(Public IP):5060
Congratulations! You have successfully installed a Kamailio SIP server and Siremis dashboard on Ubuntu 20.04. You can now easily create your SIP server and manage it using Siremis dashboard.